![]()
GETTING STARTED GUIDE
for Android
Introduction
SplashID Safe provides quick and easy access to all of your personal identification information, including usernames, passwords, credit cards, PINs, calling card numbers, frequent flyer numbers, insurance info and more. Data is stored in a secure, encrypted, password protected format and can be synchronized between SplashID Safe on your mobile device and SplashID Safe on the desktop (Windows, Mac OS, and web). You may prefer to do most of your data entry on the desktop, however, since it's faster and easier with a keyboard, and then synchronize the data with your mobile.
Account Types
Based on an all new SplashID 7.0 architecture, SplashID Safe is now the only password manager that lets the user choose how to handle sensitive records:
SplashID Cloud Services is first and foremost seamless automatic sync across all your computers & devices via our secure cloud server: anywhere, anytime. It's the quintessential "set it and forget it" sync solution for secure data.
In addition to automatic sync, the optional SplashID Cloud Services also include a new web-based version of SplashID Safe, in-app support, and access to a full suite of identity protection services with experts available on demand by phone.
This is the familiar Wi-Fi sync solution that has been in SplashID Safe since version 4. Manually connect the handheld and desktop apps over your local Wi-Fi network.
This option exists for those users who don't plan on synchronizing their SplashID Safe data. Your data will exist only in the local database on the device, and will not be automatically backed up or synchronized with any desktop or web app.
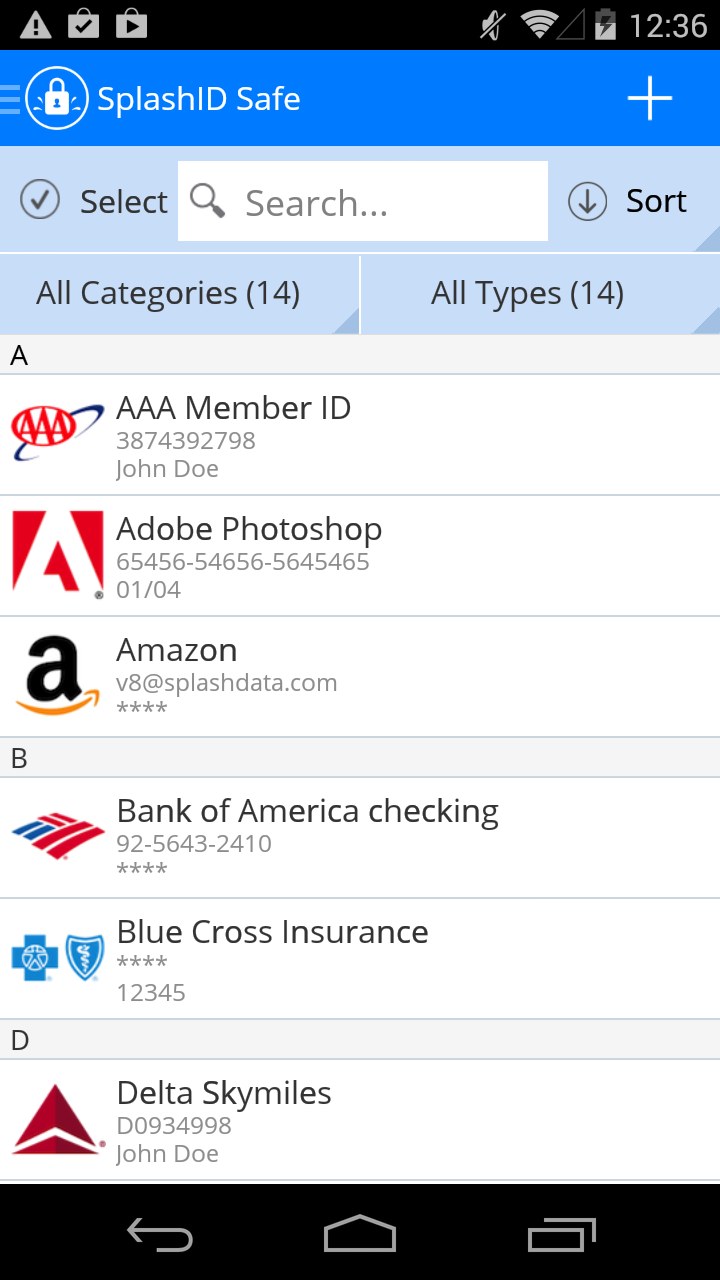
Record List
The record list is your main view for SplashID Safe. From here you will browse, search, add, edit, and view records.
Starting from the top left, here are the functions of the Record List:
- Side menu button - Access Dashboard, Backup, Settings, and Help.
- Add button - Add a new record, new type, or new category
- Category and Type filters - Select a Category or Type to filter by
- Select - Brings up an action bar on the bottom of the screen so you can select multiple records to Share, Duplicate, Move, or Delete
- Search - Search on any field with dynamic results
- Sort - Change view to sort by Name, Category, Type, Date, or Most Visited
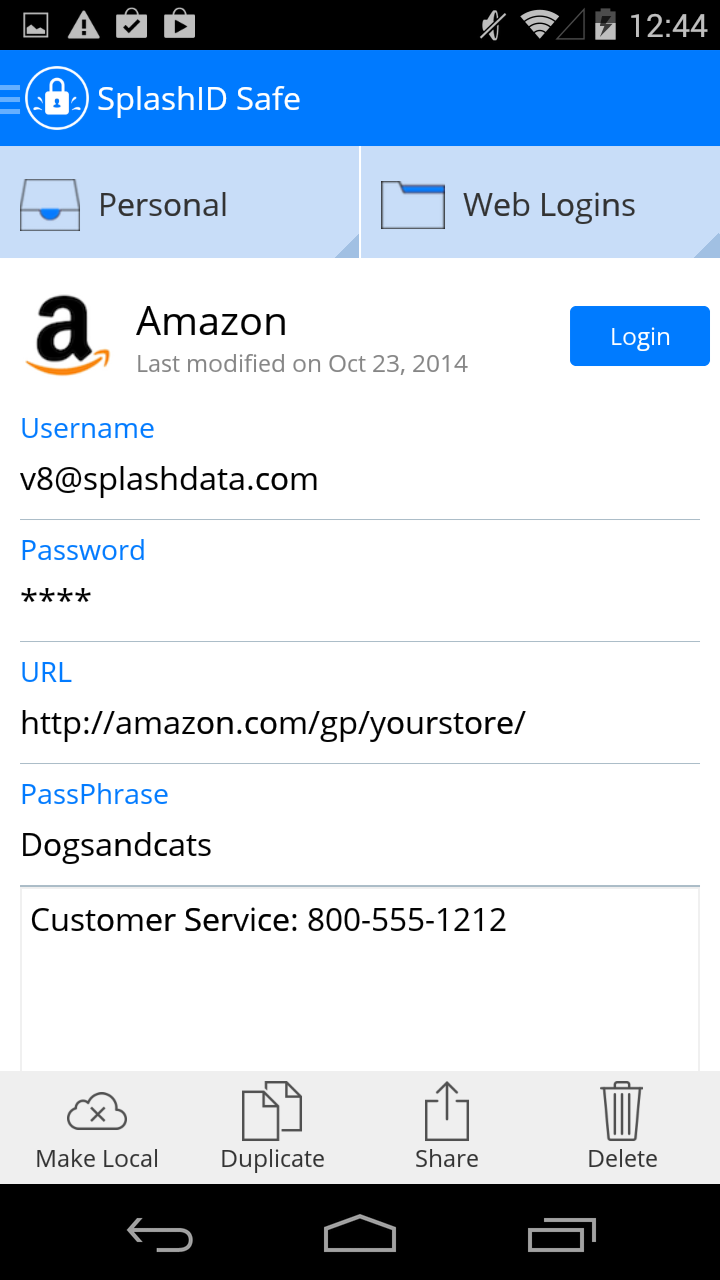
Record Details
When you tap on a record in the Record List, it opens the Record Details screen. We've designed this screen to give you everything you need on one level so you don't have to drill down to make changes.
Tap a field to access tools, such as Edit, Copy, Generate (password), and Mask. You can set password generator settings in the main Settings screen. If you want to add additional fields, tap an existing field, then tap Edit, then you can enter data on the extra fields or add attachments.
Tap the Login button next to field 1 if the record is a Web Login to open the browser and autofill the username and password. You can also turn on Auto-Submit in Settings.
Make Local will designate any record in your SplashID database as Local only. This means the record stays local on the device and does not sync to the cloud server. If the record is already on the web app or on any other devices running SplashID, it will get deleted from those apps. At any point, you can set the record back to sync with the cloud. The record would then sync back to the cloud server and appear on all devices.
Duplicate will make a copy of the current record so you can edit it and save it as a new record.
Share will send the record as a secure file for SplashID users or a limited use self-destructing web page for non-SplashID users.
Delete will delete the current record.
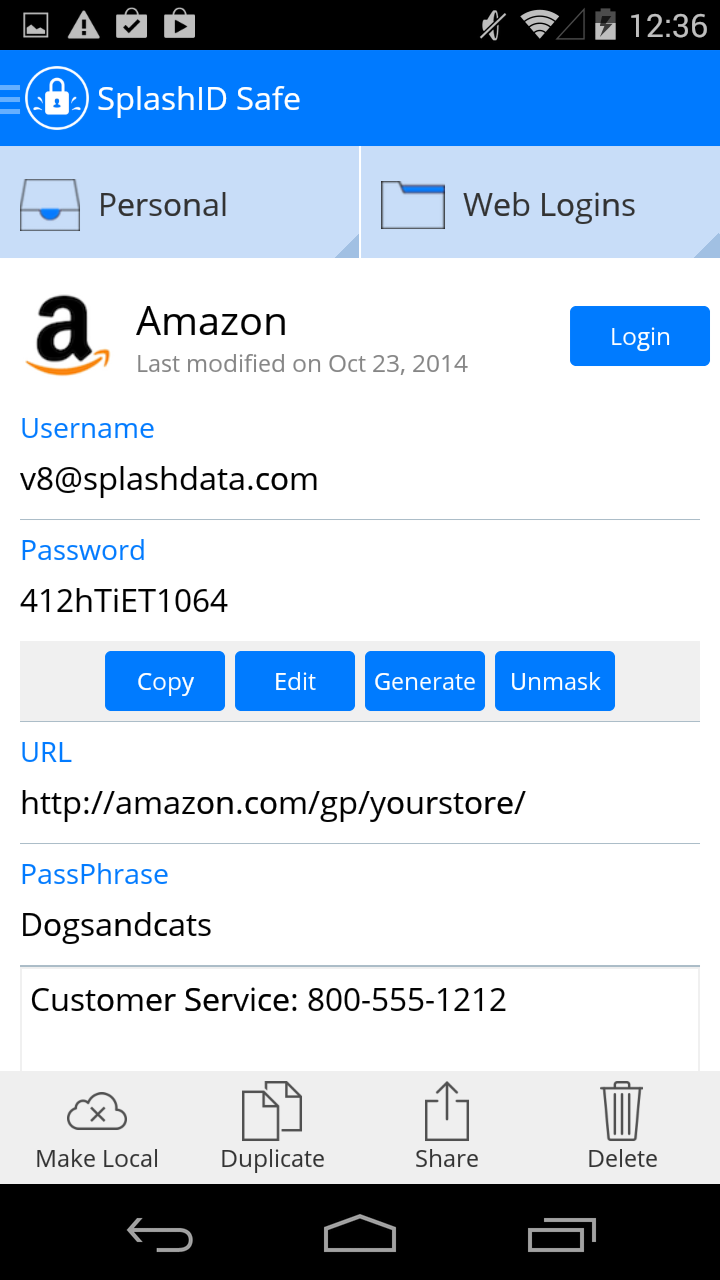
Editing Records
While viewing a record, tap a field and then the Edit button to make changes. This is also what you see when you tap the New Record button from the Record List. We've designed this screen to give you everything you need on one level so you don't have to drill down to make changes.
Tap the Category or Type menus to change the assigned category or type.
Tap the Icon to access the icon picker and make a new selection. This may not be necessary, however, as many logos are automatically assigned after you enter the record name. For example, type "Amazon" for the record name and the Amazon logo shows up when go to the next field or save.
Tap the field in the data data space or the field label to edit directly.
Tap the Notes field to add notes up to 4000 characters.
Tap the Add Attachment button to add a photo or document (up to 1 MB).
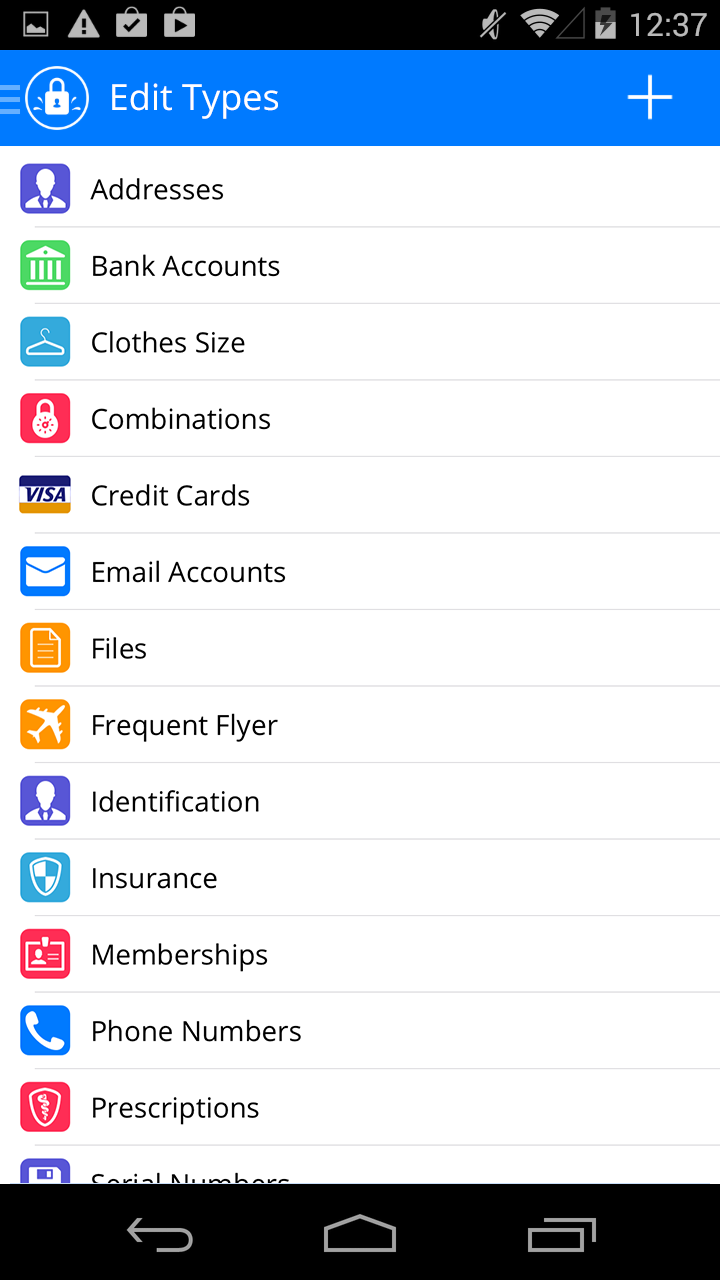
Types & Categories
The difference between Categories and Types is best illustrated by example. You use Categories to separate your Business records from your Personal records, while you use Types to separate your Credit Card records from your Web Login records.
Categories act as filters for grouping related records. The two predefined Categories are Business and Personal, though you may add more by choosing Edit Categories from the Settings screen.
Types act as templates, which define the structure for the items you want to store in SplashID. You may define up to 9 Custom field labels and a default icon for each type, as well as specify the fields you wish to mask. For example, you may create a type for Web Logins, which includes Custom field labels for username, password and URL, with a globe icon, and the password field masked; and you may create a Type for Credit Cards which includes Custom field labels for credit card number, expiration date and PIN, with a Visa icon, and the credit card number and PIN masked.
Side Menu
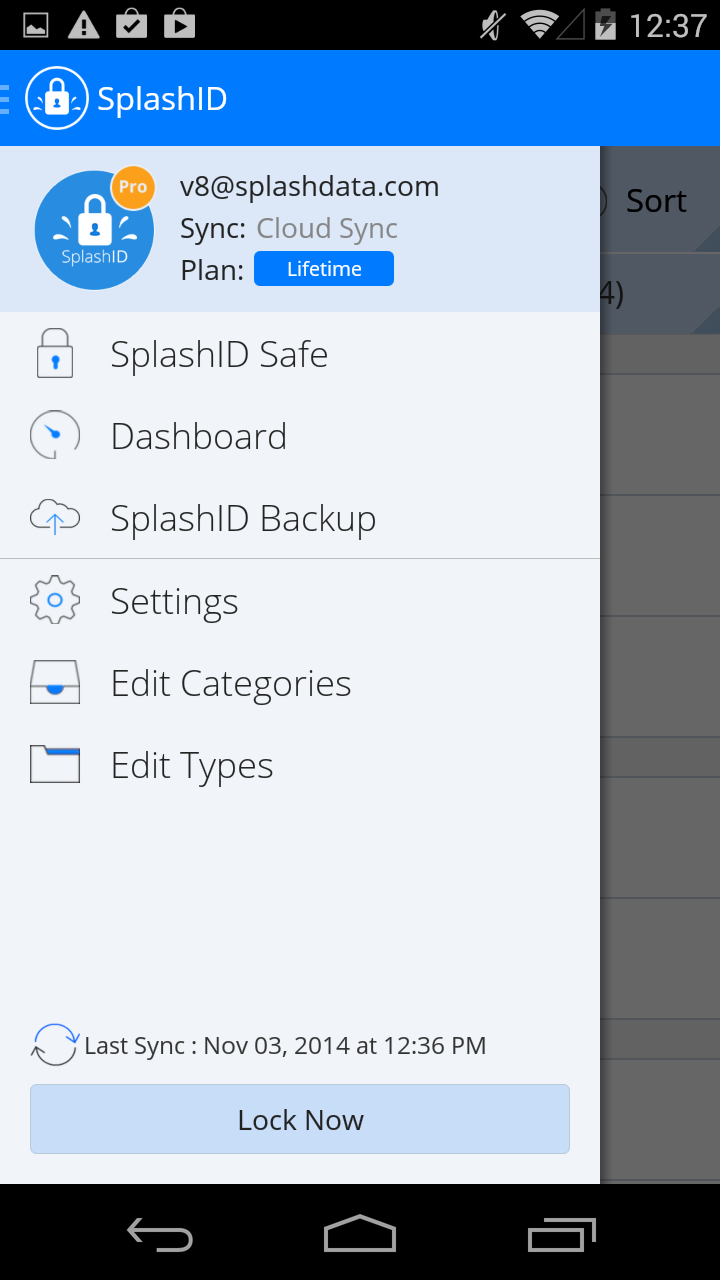
When you tap the side menu button at the top left of your screen, from any view, you can access the following options:
- SplashID Safe -- This is the Record List, where you search, view, and edit your secure records.
- Dashboard -- Access the Dashboard, where you can analyze your records and improve your security.
- SplashID Backup -- Cloud sync users will be able to access and restore online backups on those rainy days.
- Settings -- Access all the SplashID Settings. See the next section for details.
- Edit Categories -- Displays the Categories which you may edit or delete. Select an existing type and tap edit, or tap New to create a new one.
- Edit Types -- Displays the Types which you may edit or delete. Select an existing type and tap edit, or tap New to create a new one.
- Get Help -- Access the SplashData Help Desk at support.splashdata.com.
- Lock Now -- Locks and encrypts the SplashID database.
Settings
Below is a brief description of what each of the settings do.
Account Info
- Email -- This email address needs to be valid and the same on every version of SplashID Safe you use.
- Change Email -- Use this tool if you need to change your email for some reason.
- Account Summary & Sync -- View your account status and switch to a different sync solution.
- Password -- Select to edit the password protecting SplashID. See Security for more info.
Manage
- Import vID from Mass Storage or Dropbox -- If you have the Dropbox app installed, import a backup of all your records to a secure vID file (protected by your master password) from your Dropbox folder under Apps/SplashID/
- Export vID to Mass Storage Dropbox -- If you have the Dropbox app installed, you can export a backup of all your records to a secure vID file (protected by your master password) to your Dropbox folder under Apps/SplashID/
- Delete All Records -- Deletes all records in the database, in case you wish to start fresh.
- Backup -- This will make a full backup of your encrypted SplashID database on your SD card. This way you can restore the database later if you delete and reinstall SplashID, have data loss, or if you change devices.
- Restore -- Restores a backup from your SD card. Please note that the password on your database will be replaced with the password you set at the time of the backup.
- Dedupe Records -- Checks for duplicate records in your database. If any are found, tap the menu button, then select Delete Duplicates. Duplicates are only identified if all field data matches exactly between 2 different records.
Share
- Share Securely -- Use this tool to send multiple records or all of them as a secure file for SplashID users or a limited use self-destructing web page for non-SplashID users.
- Received records -- Here you will find records that other users have Shared Securely with you.
Security
- Clear Clipboard -- Clears the clipboard contents every 30 seconds.
- Auto-fill -- Fill in username and password fields automatically in the built-in browser
- Auto-submit -- Automatically submit the login form after auto-fill on the built-in browser
- Clear Filters on Exit -- This preference, when enabled, will reset the Category and Type filter selections when you exit the application, so when you return all items will be displayed.
- Timeout Settings -- Change your auto-locking timeout period: Immediately up to 10 minutes.
- Password Generator -- Change settings for password generator - length and included characters.
About SplashID -- Displays the version info.
Security
- Remember this password. You will need to use this same password to open SplashID Safe on all platforms.
- Your password must be at least 4 characters in length.
- This password is case sensitive.
- A strong password of at least 6 characters including at least one number, one upper case character, and one non-alphanumeric character is strongly recommended.
- Once you set a password, SplashID encrypts your data using 256-bit Blowfish encryption to ensure data security.
- You can optionally enter a hint to remind you of your password if you
forget.
Entering a Password -- You will be required to enter your password each time you launch SplashID, or when you turn on your handheld if SplashID was last running when it was turned off.
Changing a Password -- To change a password, select Set Password from the Settings screen, enter your Old Password, then enter and confirm the New Password.
Sharing Records
When viewing the Record Info, tap the menu button, then select Email vID. Then you have the option to set a password, which will encrypt the file and is recommended. Then you will be taken to a screen where you enter the recipient address, subject, and any message you wish to add. A SplashID vID file will be attached to the email containing the record data. It can only be imported into the SplashID Safe desktop or web applications.
Synchronization
You can start the sync process in 2 ways:
1. Tap and drag down on the record list to either start a cloud sync or initiate a WiFi sync
2. Tap the side menu button (top left) and tap the last sync button, bottom left
You have an important choice to make between local Wi-Fi sync and SplashID Cloud Services. Here's how they are used:
With version 7, we've introduced a new cloud syncing service that seamlessly updates any changes to your records when you launch the application. No more fussing with Wi-Fi sync (unless you want to).
Here's the great thing about it - we don't have to explain how to use it. Just login to your various SplashID Safe versions (iPhone, iPad, Mac, Windows, Android, Windows 8, Windows Phone, BlackBerry 10, and web app!) with the same email address, and your data synchronizes automatically. Never is it out of sync, never do you have to worry about loss of data or backing up. It just works.
This is the familiar Wi-Fi sync solution that has been in SplashID Safe since version 4. Manually connect the handheld and desktop apps over your local Wi-Fi network.
Items may be created or edited on the Handheld or Desktop and the changes can be synchronized over your local Wi-Fi network. You can download the SplashID Safe desktop for Mac or Windows from splashid.com.
By default information is synchronized in both directions, but you can adjust the settings, in Sync settings which can be found in the Options/Preferences dialog.
In most cases, you will wish to leave the Default setting (on the right) set to Synchronize. This means that after changing it to Desktop Overwrites Handheld and doing a sync, it will revert back to Synchronize for the next sync so you don't have to go back in and change the setting back manually.
Here are the possible sync settings and the results they will bring about:
- Synchronize -- Changes made on the Handheld or the Desktop will be synchronized. If a record is edited on both sides between syncs, the latest edit will win.
- Desktop overwrites handheld -- All data on the Desktop is copied to the handheld. Any data on the Handheld will be replaced.
- Handheld overwrites Desktop -- All data on the Handheld is copied to the Desktop. Any data on the Desktop will be replaced.
In order to synchronize, you must do the following:
- Turn Wi-Fi on on your handheld device, then select the same network that your computer is on for your handheld to join
- Open the SplashID desktop
- Select the correct user from the User menu in the SplashID desktop to match the device name
- Set the passwords the same on both the desktop and handheld software
- Adjust the Sync settings in Options/Preferences > Sync if you wish
- Start the Sync on the handheld, by selecting Wi-Fi sync from the Settings screen
Manual IP Address Sync
If you have trouble connecting your handheld and desktop SplashID, or if you want to want to sync remotely over the Internet, you can sync using a manual IP address.
To do this, open the Sync dialog on the handheld and tap where it says Enter an IP Address "To sync with."
Enter the IP address of the desktop computer, either on the local network or the public IP if connected directly to the Internet You can find this IP address in the SplashID Desktop under Options/Preferences > Sync.
Backup & Restore
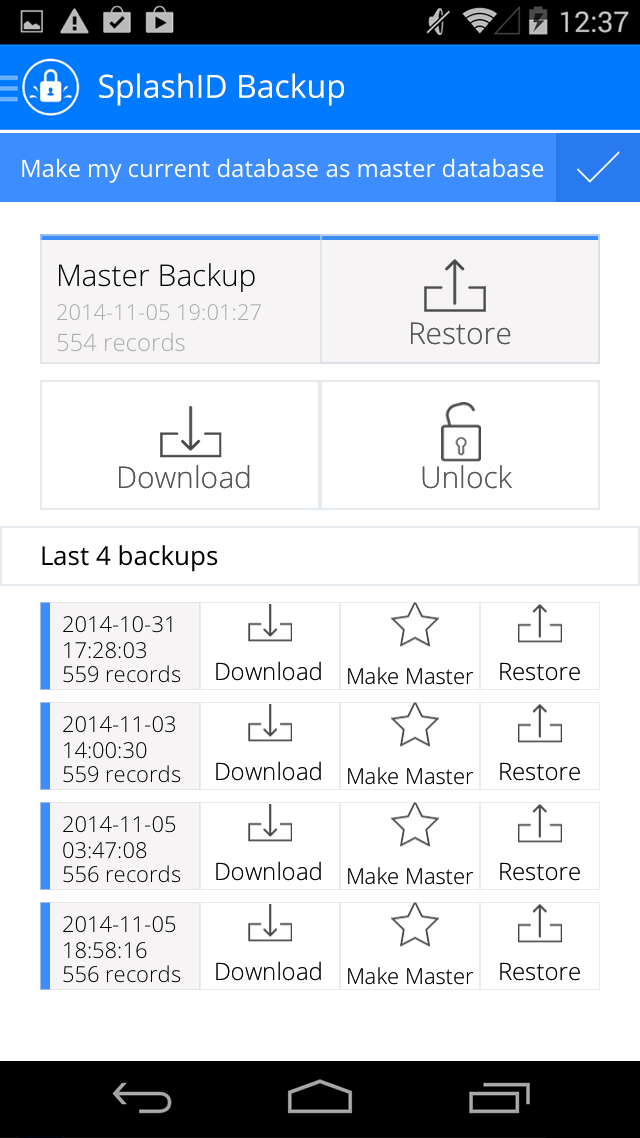
With SplashID 8, cloud sync users have a new backup service that protects them from data loss forever. Every week, a new encrypted backup is automatically created for you. Your 5 most recent backups are available anytime to download or restore as your current database. And you can lock in any backup (or your current database) as your master backup.
Hopefully you'll never need to use it, but if you do, here's how.
Login to any SplashID 8 client app - iOS, Android, Mac, or Windows - and select the SplashID Backup tab on the side menu.
To restore a backup, select the backup you would like to restore, based on the date and number of records it contains, then click Restore.
You can also make your current database the "master" backup by clicking the check mark in the first control. The master never gets overwritten by newer backups, giving you a reliable restore point once you set it. If you want to release the master backup, click the Unlock button. Or you can just replace the current master backup with your current database at any time using the first control again.
Dashboard
It seems like every day you hear about a new hacking incident or data breach, and you know you should be combing through your SplashID records, changing your old or weak passwords, and of course making sure you're not using the same passwords on multiple sites. That's what you should be doing, but the task is too often put off since it can be time-consuming and overwhelming.
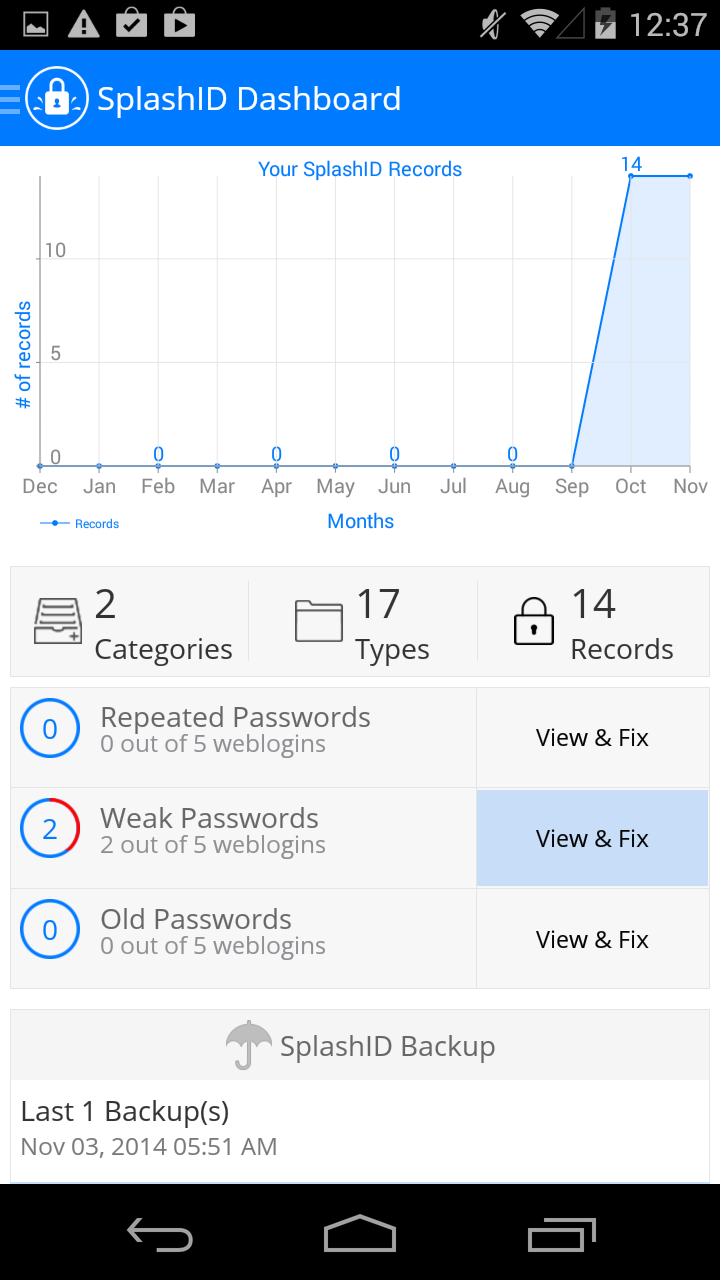
That's where our new dashboard comes in, constantly analyzing your SplashID records to identify old, weak, and reused passwords and enabling you to fix them with just a few clicks!
The graph shows you the overall growth of your SplashID database over time, and under that you will find a table indicating the total number of categories, types, and records in your database.
Below that you will find an analysis of how many of your passwords are Repeated, Weak, or Old. The progress indicator to the left shows how much of your database contains these weaknesses (in red). Tap the View and Fix button to access a list of the records that contain these weaknesses. The idea is that you take on one of these weak records, generate a stronger password in SplashID while login into the website and updating your password with the service.
At the bottom of the Dashboard screen is a handy shortcut to the SplashID Backup feature.
Getting Support
SplashData offers technical support and other resources online. SplashID Safe support is customized to meet your needs. Please visit:
/support.html
You can view knowledge base articles, ask public questions, and contact customer support to get the answers you need.